Create a New Class Session
To access the Maintain Facilitated Sessions screen, go to Resources > Maintain Facilitated Sessions in the administrative console menu. When the home screen appears, click Add from the top toolbar.
The following pop-up box will appear.
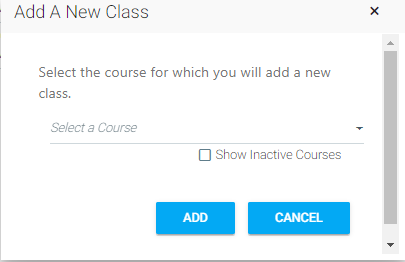
Begin typing the name of the course for which you want to add a class session. When the course name appears in the drop-down box, select the desired course, and then click Add.
The Class Tab
Once you select Add, the class tab will open.
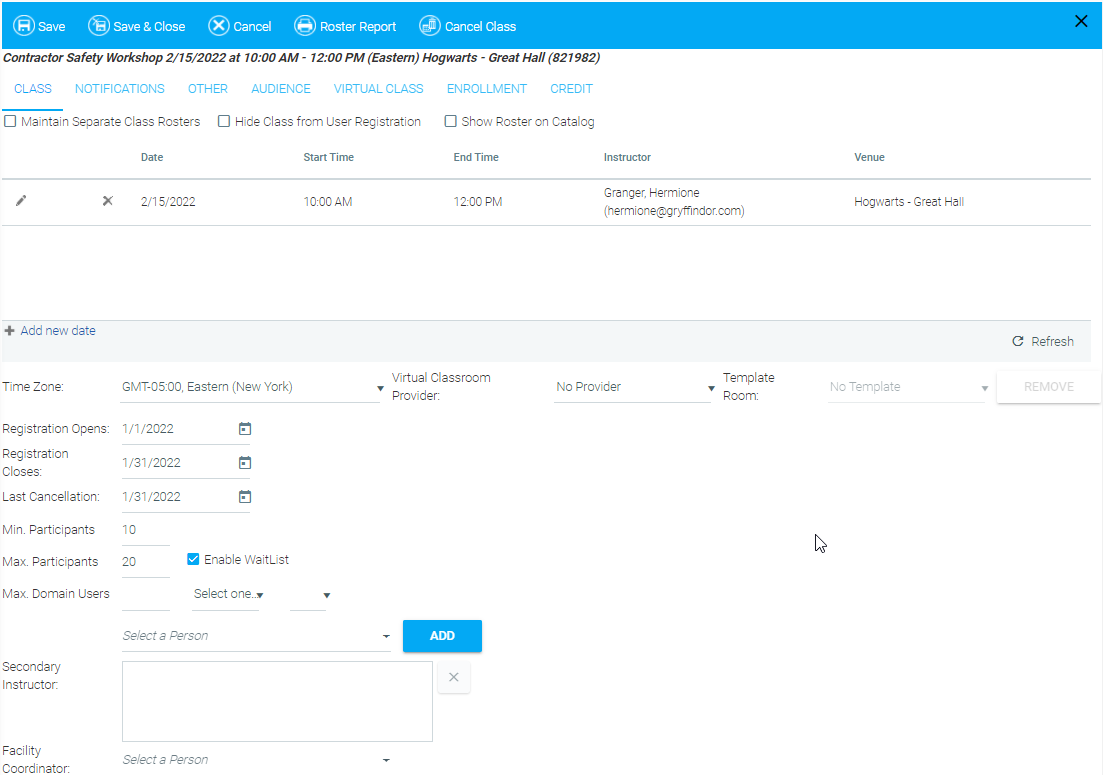
At the top are check boxes you can use to adjust how registration is handled.
- Maintain Separate Class Rosters:
- This feature will allow you to process credit separately for different days of the same class. When running the roster report, you will be given the option to run a roster for each day of the class. Check this box if the class is being held over two or more days and you would like a separate sign-in sheet for each day, or if you need to be able to grant credit to participants for completing part of the class (for example, you could grant credit to an employee for only attending 2 days of a 4 day class).
- Hide Class from User Registration:
- Check this box if you do not want this class date to be visible in the Course Catalog for user self-enrollment. This allows the administrator to hand-pick the class attendees.
- Automatically Mark Registrants as Complete:
- If this box is checked, all enrolled participants will automatically be granted credit once the class end date has passed. NOTE: This feature is not enabled for all clients. If you are interested in using this feature, contact UL CTP LearnShare Product Support.
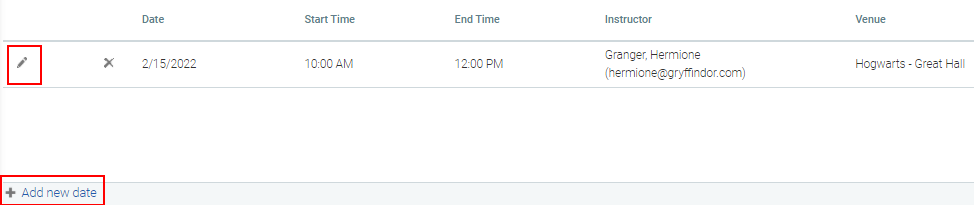
Default dates and times will already be populated, based on the Resource level settings. Click on the pencil in the left column to edit the defaults. The pencil will change into a check mark. This indicates that you are in Edit (Add) mode.
Several fields are available to edit.
- Date
- Always defaults to the current date. If the class is longer than one day, click Add new date to add each additional day. A multi-day class will appear on the user’s Development Plan with a note that it is multi-day.
- Start Time
- Defaults to 12:00 AM or the default time that was set at the Resource level.
- End Time
- Defaults to 12:00 AM or the default time that was set at the Resource level. When the length of class time (hours and minutes) is set at the Resource level on the Overview tab, the end time will automatically pre-populate based on the start time. NOTE: This will only work for one-day classes lasting 8 hours or less. Example: The course time is set at 3 hours. If a class is set to begin at 8:00am, an end time of 11:00am will automatically populate. An administrator can always override the pre-populated end time.
- Instructor
- Begin typing the name of instructor and then select the desired instructor when their name appears in the drop-down. If the instructor does not appear in the drop-down list, double-check that they have been set up with the Instructor role in the LMS. Additional instructors may be selected further down on the screen.
- Venue
- Begin typing the name of the venue and then select the desired venue when the name appears.
Click the check mark to confirm any changes you make. Once you do this, the check mark will change back to the pencil. You can always click the pencil if additional changes are needed.
Additional fields that may need to be edited are shown below the class session.
- Time Zone
- These options have been preloaded by LearnShare. Contact Support if you need to use a time zone that is not listed.
- Virtual Classroom Provider
- This option should only be used if the class is being held virtually. Use this drop-down to select a previously created Virtual Classroom Provider. Additional Virtual Classroom Providers can be set up under Tools > Maintain Virtual Classroom Providers. NOTE: This option may not be available in all systems based on your configuration options. Please note that Webex can support multi-day class sessions, however each class session must be on a different day. Webex cannot support multi-day classes that contain two sessions on the same day.
- Registration Opens
- This is the date when the class will become visible in the Course Catalog and allow users to enroll. The default is today’s date.
- Registration Closes
- This is the final day that users can enroll in the class from the Course Catalog. The default is today’s date.
- Last Cancellation
- This is the last day that a user may cancel their enrollment from the class. This date must occur before registration closes. The system will notify you if this date has been set up incorrectly.
- Cancellation Policy
- If your company has specific policies around when you can cancel and any associated fees, you can select the correct cancellation policy for this class. The default is none. System-wide cancellation policies can be set up under Tools > Maintain Cancellation policies. Once the policy has been created, it will automatically appear as an option in the drop-down.
- Min Participants
- Lists the minimum number of participants that must enroll in order for the class to occur.
- Max Participants
- Lists the maximum number of participants allowed in the class. Once this number is reached, the class will be listed as Full in the Course Catalog and Class Calendar. If you are using the Wait List functionality, users can add themselves to the waitlist once the class is full. Any additional users that are enrolled by an administrator will be automatically placed on the Wait List.
- Enable Wait List
- When this box is checked, the wait list is active for this class session. If this box is not checked, users will not be able to add themselves to the wait list once a class is full. NOTE: This checkbox will only be visible if your system has the Wait List functionality.
- Max Domain Users
- This is an optional field that allows you to restrict how many users from a given domain can enroll in the class. Once the maximum number of allowed attendees has been reached, any additional enrollments will automatically get added to the wait list (if enabled) or those users will be shown that the class is full, even when there is still space available.
- Secondary Instructor (optional)
- Select any additional instructors for this class.
- Facility Coordinator
- This is an optional field.
- Training Coordinator
- This is an optional field.
Once all of the necessary information has been entered, Click Save. If any information was entered incorrectly or required fields were skipped, the system will not allow you to continue until corrections have been made.
If you need to create additional class sessions for the same course, Click Save and Close and then repeat the previous steps. See additional information on this under the Copy category.
Related Links
The Notifications Tab
The Other Tab
The Audience Tab
The Virtual Class Tab
The Enrollment Tab
The Credit Tab
Copy a Class Session